1. Introduction:
In an increasingly security-conscious world, protecting our premises from
unauthorized access or intrusion has become a priority. Traditional security
alarm systems are effective, but integrating modern technologies can enhance
their functionality and user experience. This project aims to design and
implement a customizable security alarm system using Arduino, incorporating a
keypad for input, an LCD display for visual feedback, and the ability for users to
change the password as per their requirement.
The project leverages Arduino’s versatility and ease of programming to create a
robust security alarm system that utilizes an ultrasonic sensor for change
detection. When a change is detected, the system triggers an alarm, providing
audible and visual alerts. The addition of a keypad allows authorized individuals
to input password to stop the alarm, and importantly, the system includes
functionality for users to change the password according to their preferences,
ensuring greater flexibility and security
2. Working:
Step1:Password Verification:
When the system is powered on or reset, it prompts the user to enter a
password via the keypad. The entered password is compared with the stored password in the
Arduino’s memory. If the passwords match, the user is granted access to the system. Otherwise,
they are denied access.
Step2:Alarm System Activation:
Once the user is granted access, the system continuously monitors the
environment using sensors like an ultrasonic sensor. If any unauthorized change or movement is detected, such as an intruder’s
presence, the system triggers the alarm. The alarm can be a combination of audible alerts, such as a buzzer or siren,
and visual indicators like flashing LEDs.
Step3: Alarm Deactivation:
To deactivate the alarm, the user enters the correct password using the
keypad. If the entered password matches the stored password, the system stops the
alarm and resets to its initial state. If an incorrect password is entered, the system continues the alarm
activation.
Step4: Visual Feedback and System Status:
Throughout the process, the LCD display provides visual feedback and
information to the user.
The display can show messages like “Enter Password,” “Access Granted,”
“Access Denied,” “Alarm Activated,” or “Alarm Deactivated” to keep the user
informed about the system’s current state
Step5: Password Change:
In addition to accessing and deactivating the system, the user has the ability
to change the password. By following specific instructions, the user can input the existing password
and then enter a new password using the keypad. The Arduino updates the stored password in its memory, allowing the user
to utilize the new password for future access
3. Thing the you will get with this model:
1. Detailed Model
2. Well soldered circuits
4. project price:
You can buy this project at price 1800 Rs
You can also customize your project according to your requirement as below:
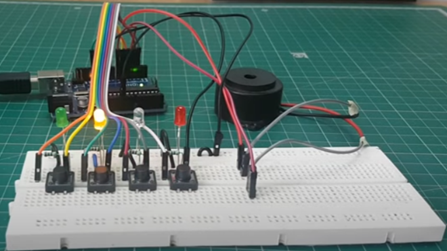
The price of this projects depend on the component used in the model, for example in the above model the component used is:
2. Key pad module
3. Battery for power supply
4. Ultrasonic sensor
5. LCD display
6. Connecting wire
7. Buzzer
8. Other small component
There are some other optional component available that you can remove or add it to the model according to your need, so the price of the project will decrease or increase according to price of component and coding.
In summery, you can tell us what functionalities and components that you want to add or remove from the model, so the price will change accordingly. If you have any question related to this project then contact me: click here Note: The image shown is a conceptual representation and may not accurately reflect the final design or features of the actual model. The actual model will be developed based on extensive research, engineering, and design processes to ensure optimal performance and user experience.
Feel free to contact me I am always here for you
Telegram: https://t.me/arduinoproject1


Comments
Post a Comment