Project No. 15: Creating an Automatic Toll Gate
1. Introduction:
Welcome to our Automatic Toll Gate project! We have created a system
that makes paying tolls easier and more efficient. With our project, vehicles
can approach the toll gate, and it will automatically open for them to pass
through.
We use special sensors to detect when a vehicle is approaching the gate.
Once the sensor detects a vehicle, the gate opens automatically, allowing the
vehicle to go through. After the vehicle passes, the gate closes again to
control the traffic flow.
To make it clear for drivers, we have added a green light that turns on
when the gate is open, signaling them to proceed. When the gate closes, a red
light turns on to indicate that the gate is closed and other vehicles should
wait.
To make payments convenient, we have also included a system that allows
drivers to pay their tolls easily. This can be done using special cards, tags,
or by scanning a QR code. Our system ensures that payments are processed
accurately and recorded securely.
2. Working:
Step1: Initialization
Set up the Arduino board and connect the
required components, including the servo motor, IR sensor, green LED, red LED,
and any other necessary components. Initialize the libraries or functions
needed to control these components.

Step2: Vehicle Detection:
The IR sensor is placed strategically near the toll
gate to detect the presence of a vehicle approaching. It emits infrared signals
and measures the reflection to determine if there is a vehicle within range.

Step3: Gate Control:
When the IR sensor detects a vehicle, it sends a
signal to the Arduino. The Arduino then activates the servo motor, causing the
gate to open and allow the vehicle to pass through.
when the gate opens, the green LED turns on to signal the driver that they can proceed. This provides a clear visual indication that the gate is open and the vehicle has permission to pass.
Step4: Vehicle Passage:
Once the vehicle passes through the gate, the IR
sensor no longer detects it. The Arduino receives this information and triggers
the servo motor to close the gate, preventing other vehicles from passing until
the next one is detected.

As the gate closes, the red LED turns on to
indicate that the gate is closed and other vehicles should wait for their turn.
This provides a clear visual indication for drivers approaching the toll gate.
Step5: Payment and System Reset:
In parallel with the gate operation, a payment
processing system is implemented. This can involve methods such as RFID tags,
smart cards, or QR code scanning for payment collection. The system
communicates with the Arduino to authenticate payments and record transactions.
After the gate closes and the vehicle passes through,
the system resets to detect the next vehicle. The IR sensor remains active,
continuously scanning for the presence of vehicles to repeat the process.
3. What is IR sensor?
In this we will use IR sensor. An IR sensor, also known as an infrared sensor, is a device that detects and measures infrared radiation in its surroundings. Infrared radiation is an electromagnetic radiation with longer wavelengths than visible light but shorter wavelengths than radio waves.
IR sensors consist of an emitter and a receiver. The emitter emits infrared radiation, and the receiver detects the reflected or emitted radiation. When an object is present in the sensor's field of view, it reflects or emits infrared radiation, which is then detected by the receiver. The sensor analyzes the received signals to determine the presence, proximity, or movement of objects.
4. Things that you will get with models:
2. Well soldered circuits
3. PPT
5. Project price:
You can buy this project at price 1400 Rs.
You can also customize your project according to your requirement as below:
The price of this projects depend on the component used in the model, for example in the above model the component used is:
2. IR Sensor
3. Battery for power supply
4. Servo Motor
5. LED and Resistor
6. connecting wire
7. other small components
There are some other optional component available that you can remove or add it to the model according to your need, so the price of the project will decrease or increase according to price of component according to price of component and coding for example:
1. With display:
You can add the display to indicate number of vehicle passed, with this component the price of project is 1440 Rs.
In summery, you can tell us what functionalities and components that you want to add or remove from the model, so the price will change accordingly. If you have any question related to this project then contact me: click here
Basically you will get all this things that required to present this project in front of your external, teacher, for practical use at your home or to show off in front of your friends 😉😉,so if you want to buy this project then fill this google form: https://docs.google.com/forms/d/e/1FAIpQLSfDQvyFqN1iDLOFhGNB0KK_nEW1rZujUEdmvNNQNazXK4tAZA/viewform?usp=sf_link
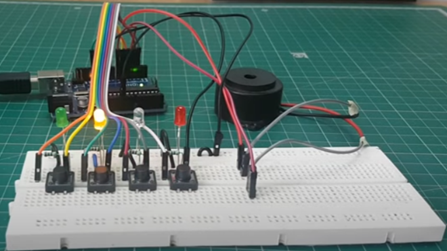
Note: The image shown is a conceptual representation and may not accurately reflect the final design or features of the actual model. The actual model will be developed based on extensive research, engineering, and design processes to ensure optimal performance and user experience.
Feel free to contact me I am always here for you
About Us: click here
Contact Detail: click here
For delivery detail: click here
Telegram: https://t.me/arduinoproject1

Comments
Post a Comment