Project No. 25: Creating a Path Following Car
1. Introduction:
The Automatic Path Following Car project introduces an autonomous
vehicle that can navigate a predefined path with the help of black tapes placed
on the floor and infrared (IR) sensors. By utilizing sensor feedback and
intelligent control algorithms, this project aims to create a self-guided car
that can follow a designated route accurately and autonomously.
The
core components of this project are the IR sensors, which are strategically
positioned on the car’s chassis. These sensors emit infrared light and measure
the intensity of reflected light. By placing black tapes on the floor to define
the desired path, the IR sensors detect variations in the reflected light
intensity when passing over the tapes.
The
microcontroller serves as the brain of the car, processing the sensor readings
and making decisions based on the detected path. By analyzing the output from
the IR sensors, the microcontroller can determine whether the car is centered
on the black tape or deviating from the path.
The
motor control system plays a crucial role in translating the sensor data into
physical movement. Based on the microcontroller’s analysis, it sends signals to
the motor driver, adjusting the car’s direction and speed to keep it aligned
with the black tape. This dynamic control mechanism allows the car to make
real-time course corrections and effectively navigate along the designated
path.
The
microcontroller serves as the brain of the car, processing the sensor readings
and making decisions based on the detected path. By analyzing the output from
the IR sensors, the microcontroller can determine whether the car is centered
on the black tape or deviating from the path.
The
motor control system plays a crucial role in translating the sensor data into
physical movement. Based on the microcontroller’s analysis, it sends signals to
the motor driver, adjusting the car’s direction and speed to keep it aligned
with the black tape. This dynamic control mechanism allows the car to make
real-time course corrections and effectively navigate along the designated
path.
2. Working:
Step1: Sensor Placement:Mount one sensor on the left side and another on
the right side of the rear wheel, positioned to scan the area in front of the
car. The sensors will emit infrared light and measure
the intensity of the reflected light. When the sensors pass over the black
tape, they will receive less reflected light compared to when they are off the
tape. This change in reflected light intensity indicates the presence of the
black tape.

Step2: Path Detection: If both sensors detect the black tape, it
indicates that the car is on track and following the path correctly. If only
one sensor detects the black tape while the other does not, the microcontroller
will determine that the car is deviating from the path. The sensors will continuously monitor the
reflected light intensity. The microcontroller will read the sensor outputs to
determine if the car is centered on the black tape or deviating from the path.
Step3: Steering Adjustment: Based on the sensor readings, the microcontroller will
adjust the motor speeds to correct the car’s position and steer it back to the
center of the black tape. For example, if the left sensor detects the tape
while the right sensor does not, the microcontroller can increase the speed of
the right motor to correct the deviation and bring the car back on track. Based on the interpreted commands, control the motor driver's inputs from the Arduino. Adjust the control signals sent to the motor driver to make the car move in the desired direction and at the desired speed. For example, to move the car forward, activate the appropriate motor inputs to rotate the wheels in the forward direction.
Step4: Real-Time Corrections: The microcontroller will continuously
analyze the sensor outputs and make real-time adjustments to the motor speeds
to keep the car aligned with the black tape. It will monitor the relative
intensities of the reflected light detected by each sensor to ensure that the
car stays centered on the path.
Step5: Smooth Path Following: By constantly adjusting the
motor speeds based on the sensor readings, the microcontroller will enable the
car to make smooth and precise course corrections, maintaining accurate path
following behavior.
Step6: Looping: The system will repeat the process of sensor
reading, motor control adjustment, and steering correction continuously as the
car moves along the path. This ensures that the car remains aligned with the
black tape and can adapt to changes in the path in real-time.
Step1: Sensor Placement:
Mount one sensor on the left side and another on
the right side of the rear wheel, positioned to scan the area in front of the
car. The sensors will emit infrared light and measure
the intensity of the reflected light. When the sensors pass over the black
tape, they will receive less reflected light compared to when they are off the
tape. This change in reflected light intensity indicates the presence of the
black tape.

Step2: Path Detection:
If both sensors detect the black tape, it
indicates that the car is on track and following the path correctly. If only
one sensor detects the black tape while the other does not, the microcontroller
will determine that the car is deviating from the path. The sensors will continuously monitor the
reflected light intensity. The microcontroller will read the sensor outputs to
determine if the car is centered on the black tape or deviating from the path.
Step3: Steering Adjustment:
Based on the sensor readings, the microcontroller will
adjust the motor speeds to correct the car’s position and steer it back to the
center of the black tape. For example, if the left sensor detects the tape
while the right sensor does not, the microcontroller can increase the speed of
the right motor to correct the deviation and bring the car back on track. Based on the interpreted commands, control the motor driver's inputs from the Arduino. Adjust the control signals sent to the motor driver to make the car move in the desired direction and at the desired speed. For example, to move the car forward, activate the appropriate motor inputs to rotate the wheels in the forward direction.
Step4: Real-Time Corrections:
The microcontroller will continuously
analyze the sensor outputs and make real-time adjustments to the motor speeds
to keep the car aligned with the black tape. It will monitor the relative
intensities of the reflected light detected by each sensor to ensure that the
car stays centered on the path.
Step5: Smooth Path Following:
By constantly adjusting the
motor speeds based on the sensor readings, the microcontroller will enable the
car to make smooth and precise course corrections, maintaining accurate path
following behavior.
Step6: Looping:
The system will repeat the process of sensor
reading, motor control adjustment, and steering correction continuously as the
car moves along the path. This ensures that the car remains aligned with the
black tape and can adapt to changes in the path in real-time.
3. What is Gear Motor?
A gear motor is a type of electric motor that incorporates a gearbox, or gear train, to control and enhance its output speed and torque. It combines the functions of a motor and a gear system into a single integrated unit.
The primary purpose of a gear motor is to provide mechanical power and motion control in various applications. By using gears, the motor can increase or decrease the output speed and torque according to the requirements of the specific application. Gears are used to transmit power from the motor to the driven load while modifying the characteristics of the output motion.
4. Things that you will get with models:
1. Detailed Model
2. Well soldered circuits
3. PPT
1. Detailed Model
2. Well soldered circuits
3. PPT
5. Project price:
You can buy this project at price 2100 Rs.
You can also customize your project according to your requirement as below:The price of this projects depend on the component used in the model, for example in the above model the component used is:
1. Arduino UNO
2. 2 x Battery for power supply
3. Red and Green LED and Resistor4. 4 x Gear Motor5. 4 x Wheel6. castor Wheel7. l293d Motor Driver8. connecting wire9. Other small components
There are some other optional component available that you can remove or add it to the model according to your need, so the price of the project will decrease or increase according to price of component according to price of component and coding for example:
There is another type of similar project available in which there is 2 gear motor and 1 castor wheel in from of car, with this component the price of project is 1900Rs.
In summery, you can tell us what functionalities and components that you want to add or remove from the model, so the price will change accordingly. If you have any question related to this project then contact me: click hereBasically you will get all this things that required to present this project in front of your external, teacher, for practical use at your home or to show off in front of your friends 😉😉,so if you want to buy this project then fill this google form: https://docs.google.com/forms/d/e/1FAIpQLSfDQvyFqN1iDLOFhGNB0KK_nEW1rZujUEdmvNNQNazXK4tAZA/viewform?usp=sf_link
You can buy this project at price 2100 Rs.
You can also customize your project according to your requirement as below:
The price of this projects depend on the component used in the model, for example in the above model the component used is:
3. Red and Green LED and Resistor
4. 4 x Gear Motor
5. 4 x Wheel
6. castor Wheel
7. l293d Motor Driver
8. connecting wire
9. Other small components
There are some other optional component available that you can remove or add it to the model according to your need, so the price of the project will decrease or increase according to price of component according to price of component and coding for example:
There is another type of similar project available in which there is 2 gear motor and 1 castor wheel in from of car, with this component the price of project is 1900Rs.
In summery, you can tell us what functionalities and components that you want to add or remove from the model, so the price will change accordingly. If you have any question related to this project then contact me: click here
Basically you will get all this things that required to present this project in front of your external, teacher, for practical use at your home or to show off in front of your friends 😉😉,so if you want to buy this project then fill this google form: https://docs.google.com/forms/d/e/1FAIpQLSfDQvyFqN1iDLOFhGNB0KK_nEW1rZujUEdmvNNQNazXK4tAZA/viewform?usp=sf_link
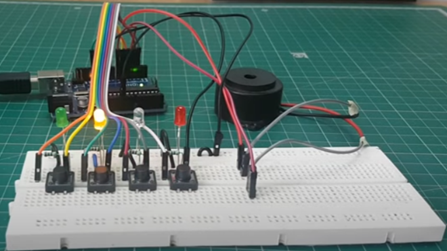
Note: The image shown is a conceptual representation and may not accurately reflect the final design or features of the actual model. The actual model will be developed based on extensive research, engineering, and design processes to ensure optimal performance and user experience.
Feel free to contact me I am always here for you
About Us: click hereContact Detail: click hereFor delivery detail: click here Telegram: https://t.me/arduinoproject1
Note: The image shown is a conceptual representation and may not accurately reflect the final design or features of the actual model. The actual model will be developed based on extensive research, engineering, and design processes to ensure optimal performance and user experience.
Feel free to contact me I am always here for you
About Us: click here
Contact Detail: click here
For delivery detail: click here
Telegram: https://t.me/arduinoproject1

Comments
Post a Comment