Project No. 11: Creating Guess the Number Game With Arduino
1. Introduction:
Welcome to the exciting world of “Guess the Number”! In this Arduino
project, we bring to life a classic guessing game where you, the user, will put
your skills to the test as you try to guess a secret two-digit number. With the
help of a keypad for input and a display to show the results, get ready for an
interactive and engaging experience.
Using the power of Arduino, a versatile microcontroller board, we have
created a game that challenges your ability to decipher the hidden number. With
the keypad, you’ll enter your guesses, and the Arduino will provide instant
feedback on the display, guiding you towards the correct answer.
As you key in your guesses, the display will come to life, revealing
vital information to assist you. Will it display “Too high” or “Too low,”
indicating whether your guess is above or below the target number? Or will it
proudly showcase “Congratulations” when you successfully guess the correct
number?
2. Working:
Step1: Initialization:
When the game starts, the Arduino will initialize the keypad and display
components. It will generate a random two-digit number as the target number for
the user to guess.

Step2: User Input:
The user will enter their guesses using the keypad. The Arduino will
receive and process the input from the keypad.

Step3: Guess Evaluation:
The Arduino will compare the user’s guess with the target number. If the
guess matches the target number exactly, the Arduino will display a Congratulations” message on the display,
indicating the user has won the game. If the guess is higher or lower than the
target number, the Arduino will display a “Too high” or “Too low” message,
respectively, providing feedback to the user.

After providing feedback, the Arduino will prompt the user to make
another guess. The user can continue making guesses until they guess the correct number
or reach a maximum number of allowed attempts.
Step4: Game Completion:

If the user guesses the correct number, the Arduino will display a
victory message, indicating the game is won. If the user exceeds the maximum
number of attempts without guessing the correct number, the Arduino will
display a “Game Over” message, indicating the game is lost.
Step5: Restart Option:
After the game is won or lost, the Arduino can
provide an option to restart the game, allowing the user to play again with a
new randomly generated target number.
3. What is OLED display?
An OLED (Organic Light-Emitting Diode) display is a type of display technology that uses organic compounds to emit light when an electric current is applied. It is a self-emissive display, meaning it does not require a backlight like traditional LCD displays. OLED displays offer several advantages, including high contrast, wide viewing angles, and low power consumption.
In the context of the "Guess the Number" game with Arduino, incorporating an OLED display enhances the user interface and provides real-time visual feedback during gameplay. The OLED display will serve as a medium to show messages and information related to the game, such as the user's guesses, feedback on whether the guess is too high or too low, and victory or game over messages
4. Things that you will get with models:
2. Well soldered circuits
3. detailed Report Book
4. PPT
5. ALL imp thing
5. Project price:
You can buy this project at price 1500 Rs.
You can also customize your project according to your requirement as below:
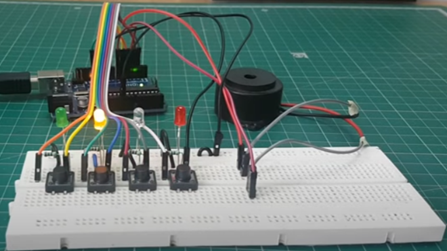
The price of this projects depend on the component used in the model, for example in the above model the component used is:
2. OLED display
3. Battery for power supply
4. Buttons
5. Resistors
6. LEDs
7. connecting wire
8. other small components
There are some other optional component available that you can remove or add it to the model according to your need, so the price of the project will decrease or increase according to price of component used in the project and coding.
In summery, you can tell us what functionalities and components that you want to add or remove from the model, so the price will change accordingly. If you have any question related to this project then contact me: click here
Basically you will get all this things that required to present this project in front of your external, teacher, for practical use at your home or to show off in front of your friends 😉😉,so if you want to buy this project then fill this google form: https://docs.google.com/forms/d/e/1FAIpQLSfDQvyFqN1iDLOFhGNB0KK_nEW1rZujUEdmvNNQNazXK4tAZA/viewform?usp=sf_link
Note: The image shown is a conceptual representation and may not accurately reflect the final design or features of the actual model. The actual model will be developed based on extensive research, engineering, and design processes to ensure optimal performance and user experience.
Feel free to contact me I am always here for you
About Us: click here
Contact Detail: click here
For delivery detail: click here
Telegram: https://t.me/arduinoproject1

Comments
Post a Comment