Project No. 12: Creating Mario Game With Arduino
1. Introduction:
Welcome to the exciting world of Arduino game development! In this
project, we embark on a journey to recreate the magic of the iconic Mario game
using an Arduino board, an LCD display, and a push button. By combining
hardware and software, we will bring Mario to life on a small screen and
immerse ourselves in the nostalgic charm of this classic platformer.
Our goal is to create an interactive experience where players can
control Mario’s movements and help him overcome challenges by timing their jumps
accurately. With the Arduino as our foundation, we’ll harness its capabilities
to render a dynamic game environment, allowing us to navigate Mario through a
series of obstacles and platforms.
Through this project, we’ll delve into the fascinating realm of Arduino
programming, explore graphical displays with the LCD module, and master the art
of user input using a push button. By combining these elements, we’ll create a
delightful and engaging game that captures the essence of the beloved Mario
franchise.
2. Working:
Step1: Initialization:
The Arduino board initializes the LCD display
and sets up the necessary configurations and libraries to communicate with it.

Step2: Game Environment:
You design the game environment, including
platforms, obstacles, and other elements that Mario will encounter. These
elements will be displayed on the LCD screen.
Create or obtain sprite images representing Mario in
different states (standing, jumping, running, etc.). These images will be displayed
on the LCD to animate Mario’s movements.
Step3: Input:
A push button is connected to the Arduino board as the
input mechanism for controlling Mario’s jumps. When the button is pressed, the
Arduino detects the input signal.

The Arduino’s code implements the game logic. It
constantly checks for button inputs and updates the position of Mario
accordingly. When the jump button is pressed, Mario’s position is modified to
simulate a jump.
Step4: Collision Detection:
The Arduino code also includes collision
detection. It checks if Mario collides with obstacles or platforms in the game
environment. If a collision occurs, appropriate actions are taken, such as
ending the game or awarding points.
Step5: Scoring and Levels:
The Arduino keeps track of the player’s score and
updates it based on achievements within the game. You can implement multiple
levels or challenges to increase the difficulty and make the game more
engaging.
Step6: Display Update:
The LCD display is updated based on the current game
state. This includes rendering the game environment, Mario’s position, score,
and other relevant information for the player.
Step5: Game Loop:
The Arduino continuously runs a game loop where it
updates the game state, checks for inputs, handles collisions, and refreshes
the display. This loop ensures the game runs smoothly and responsively.
3. What is LCD display?
An LCD (Liquid Crystal Display) is a type of display technology commonly used in electronic devices, including Arduino projects. It consists of a panel made up of liquid crystals that can change their optical properties when an electric current is applied.
LCD displays are widely used due to their versatility, low power consumption, and cost-effectiveness. They come in various sizes, from small character displays to larger graphical displays.
4. Things that you will get with models:
2. Well soldered circuits
3. PPT
4. circuit in box
5. Project price:
You can buy this project at price 1600 Rs.
You can also customize your project according to your requirement as below:
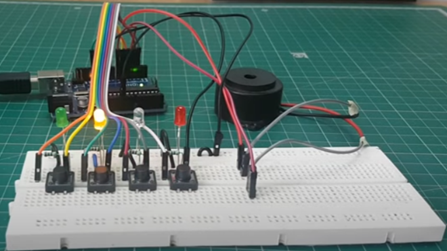
The price of this projects depend on the component used in the model, for example in the above model the component used is:
2. LCD display
3. Battery for power supply
4. Buttons
5. Resistors
6. LEDs
7. connecting wire
8. other small components
There are some other optional component available that you can remove or add it to the model according to your need, so the price of the project will decrease or increase according to price of component used in the project and coding .
In summery, you can tell us what functionalities and components that you want to add or remove from the model, so the price will change accordingly. If you have any question related to this project then contact me: click here
Basically you will get all this things that required to present this project in front of your external, teacher, for practical use at your home or to show off in front of your friends 😉😉,so if you want to buy this project then fill this google form: https://docs.google.com/forms/d/e/1FAIpQLSfDQvyFqN1iDLOFhGNB0KK_nEW1rZujUEdmvNNQNazXK4tAZA/viewform?usp=sf_link
Note: The image shown is a conceptual representation and may not accurately reflect the final design or features of the actual model. The actual model will be developed based on extensive research, engineering, and design processes to ensure optimal performance and user experience.
Feel free to contact me I am always here for you
About Us: click here
Contact Detail: click here
For delivery detail: click here
Telegram: https://t.me/arduinoproject1

Comments
Post a Comment